How to remove the tripod from 360 photos in a simple way?
In this video tutorial, Pablo Méndez shares one of the simplest techniques to remove the tripod from 360 photos.
This post and video tutorial are presented by Pablo Méndez. Pablo is a 360 photographer from Costa Rica, currently living in Florida, US. You can find him on Kuula, YouTube and Facebook.
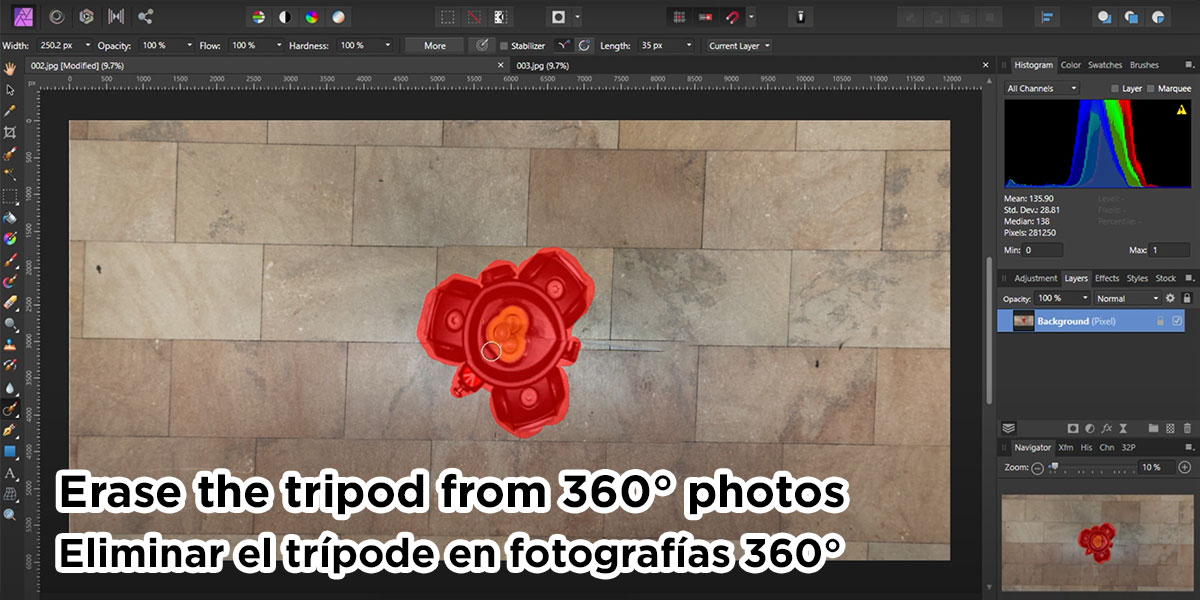
In order to erase any unwanted objects in a panoramic photo (which includes the tripod, people or glitches and spots), it is good to check how complex and difficult this is going to be and also what is the final objective of the photo.
In case of tripods, if the floor doesn't have a complex pattern, you can remove the tripod using a mobile app such as TouchRetouch or a with the "Clone tool" in Adobe Photoshop. For more complex tasks, we can still consider the clone tool, however when the patterns are complicated, I prefer to solve this with Affinity Photo, because it has better content removal and image processing algorithms.
To sum up using the clone tool is a good start, but it will not always be 100% effective. In the video below, I show what to do in this case and how to fine-tune details with tools such as patching, until we achieve the best result.
For the final result, please take a look at this tour, where the tripod has been removed using the techniques shown in the video:
For reference, here's a list of applications and image editors I use in the video:
- Adobe Photoshop
- Affinity Photo
- TouchRetouch for iOS
If you are in a hurry or do not want to retouch the photos for other reason, please take a look at the Kuula Nadir Patch feature. It allows you to cover the tripod area with a logo or other image.