How to Embed Your Virtual Tour Onto Your WordPress Site
WordPress is the the world's most popular website platform. Even if you don't have a WordPress site, there's a decent chance one of your clients might, so some basic familiarity with WordPress is valuable.
WordPress is an open source software project. It's free. It supports numerous 3rd party plugins and widgets that give it endless versatility. You can use WordPress to build a website on any hosting platform you like, meaning your WordPress site could be very inexpensive.
With this endless freedom however comes more complexity compared to fully-managed platforms like Squarespace or Wix.
So how do you put a virtual tour on a WordPress site? Well, that's actually a loaded question because there isn't just one WordPress editor. The plugins you can install include alternative editors too! We'll discuss these alternative editors in a future article.
In this article, we'll tackle the inbuilt "vanilla" WordPress editor.
Vanilla WordPress Editor
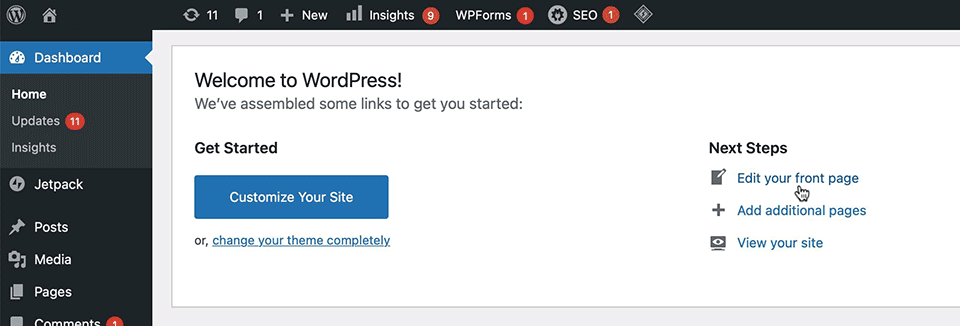
Step 1
First enter the editor from your WordPress Dashboard by clicking, Edit your front page.
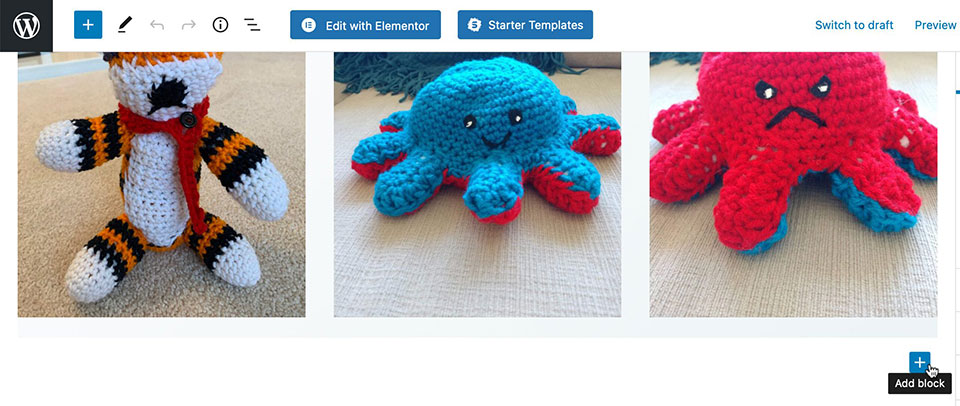
Step 2
Next, choose the area on the site you'd like to add your tour (you can always move this around later) and click the + button to Add block.
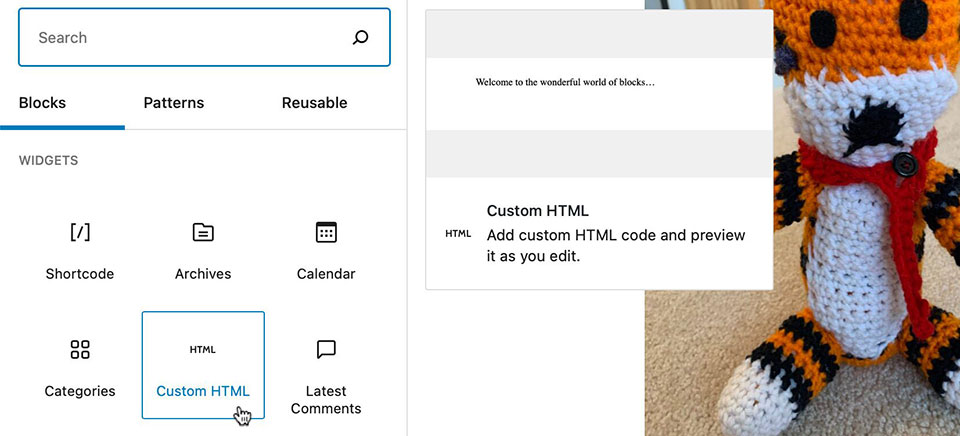
Step 3
A quick list of frequently used Blocks will appear or click Browse All to see a complete list of available blocks on the left. Scroll down to the Widgets section and click Custom HTML.
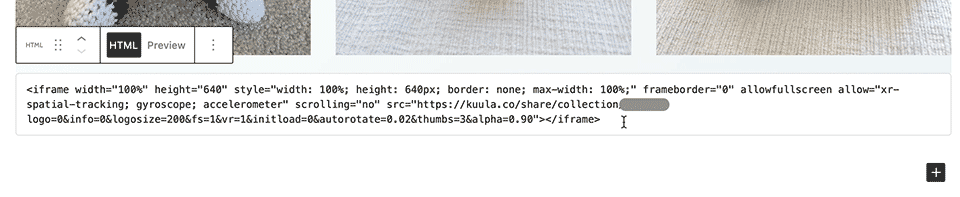
Step 4
A new text box will appear that says, "Write HTML...." After copying your tour's HTML embed code, paste it here.
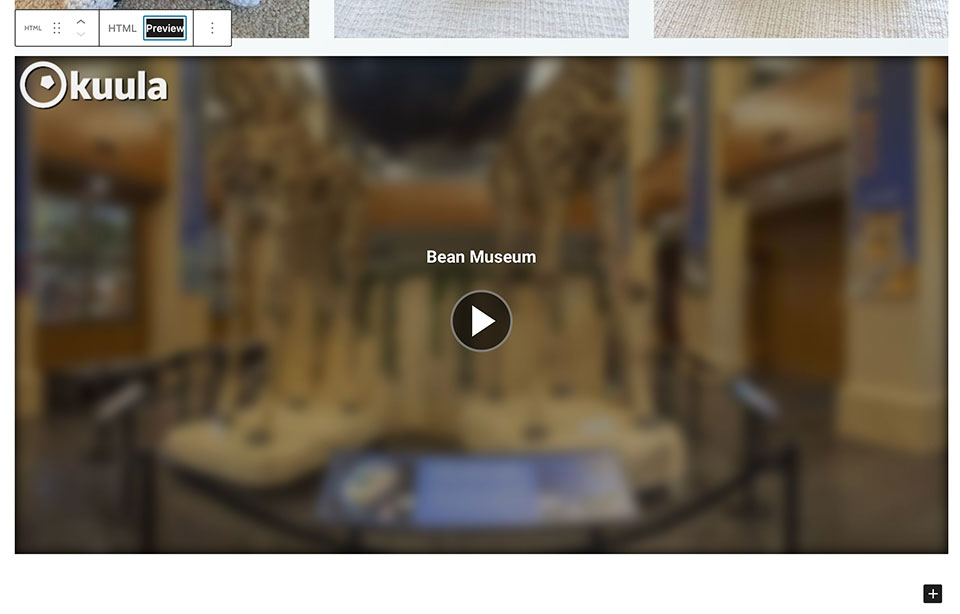
Step 5
Now hit Preview and your tour will appear.
Some Tips:
When generating your HTML code in the Kuula Export Editor, you'll want your dimensions to have a width of 100% and to set the height at whatever number of pixels is your preference.
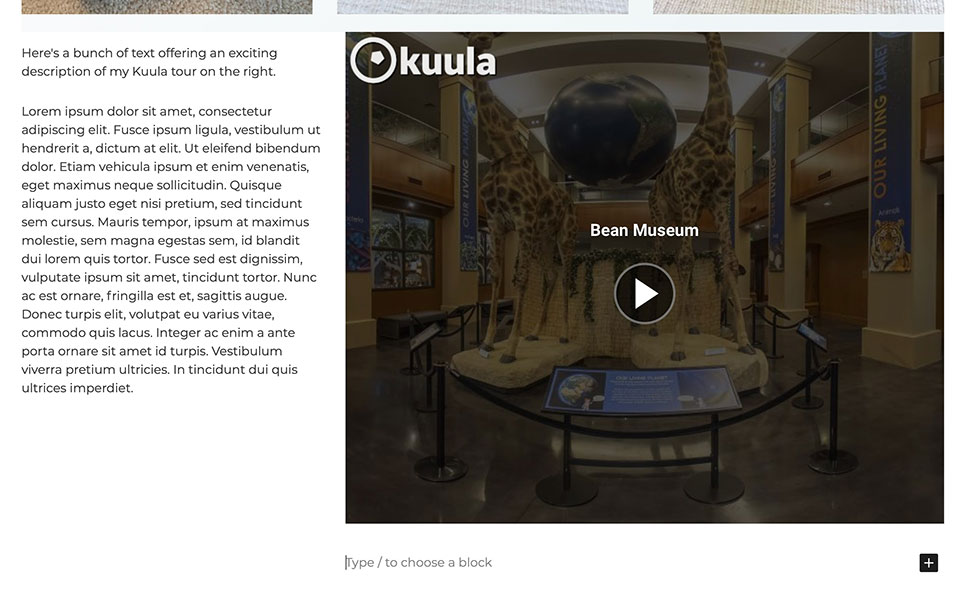
If you don't want your tour to fill the entire width of the page, you can first select the "Columns" widget when adding a new block, then add your tour to either column as described above.
Final Tip
And finally, this tip was shared with my previous two articles but I think it bears repeating. When sharing your tours I recommend setting "Loading" to "Start with title screen." Compared to having the tour autoload, this will improve site performance and you won't shock anyone if you happen to have music on your tour. You'll even boost search engine optimization with a faster loading site.
I hope this has been helpful. In my next article we'll address alternative editors, namely Elementor, one of WordPress' most popular. You can check out the article on how to embed your Kuula tour using Elementor here.