Tutorial: How to shoot 360 photos with a smartphone
When Google Street View first came out, it was an amazing technical achievement. Browsing 360° Street View photos felt a lot like actually going to all these places!
Those photos were made by expensive and bulky cameras mounted of cars, but today 360° photo making is becoming more accessible for everyone thanks to a new generation of devices such as Ricoh Theta S or the Samsung Gear 360.
In the long run, it's quite likely that we will be able to snap 360°s with our smartphones, using a pair of integrated wide-angle lenses or even some more advanced tech such a light-field camera that Lytro is working on.
Meanwhile, to get a taste how fun 360° photography can be, you do not need to spend any money, because there's an app for that!
Photospheres in the Google Street View app
Whether you are on iOS or Android, you can grab the Google Street View app from the AppStore or Google Play Store. This app was created for people to browse the 360° Street View content, but it also includes a functionality to make 360° photos.
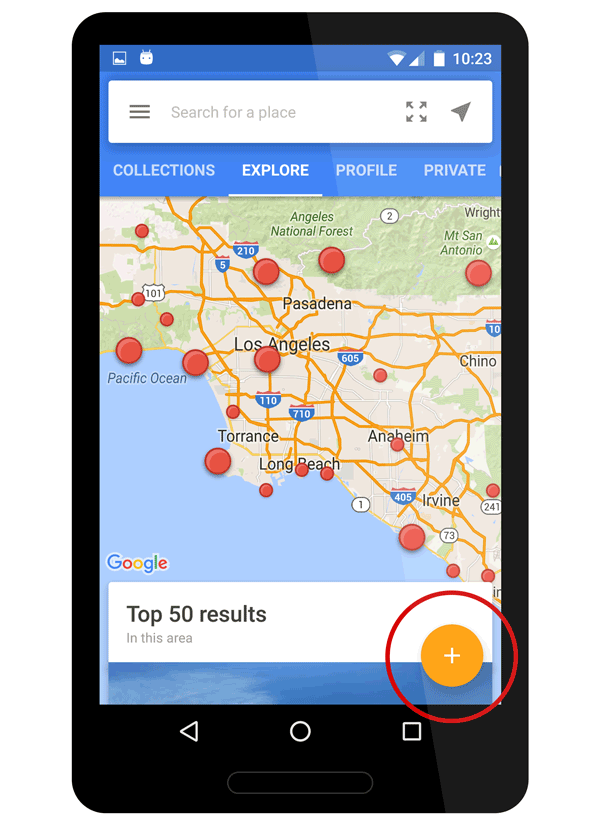
Open the app, and click on the plus icon in the bottom-right corner of the screen.

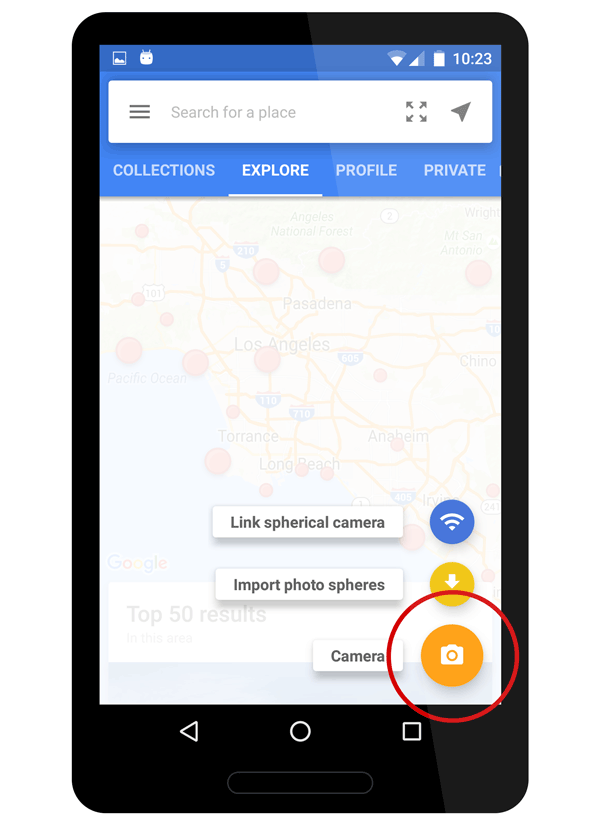
From the context menu that appears, choose Camera.

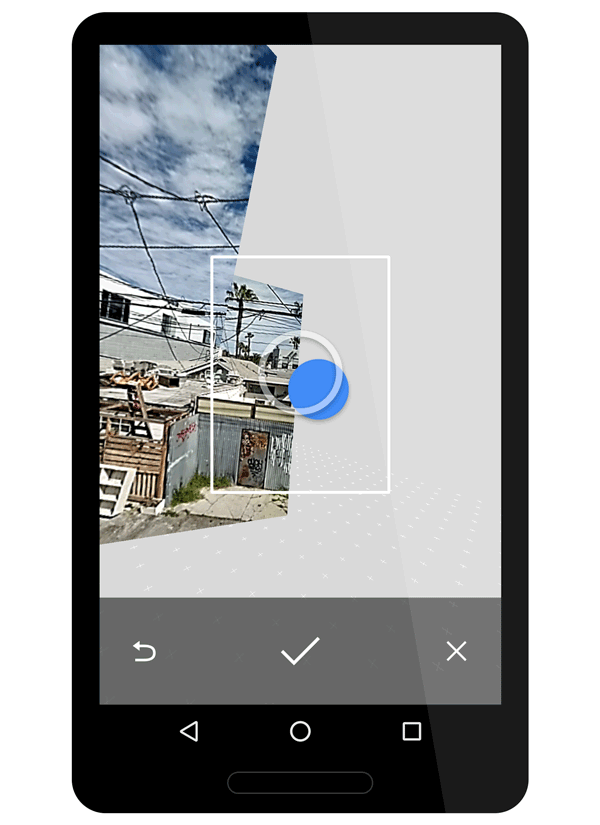
You will be taken to the camera screen. Follow the instructions and start taking the individual photos (you need to make ~30 of them to assemble on full 360° spherical picture. It's fun, but it takes a while :)

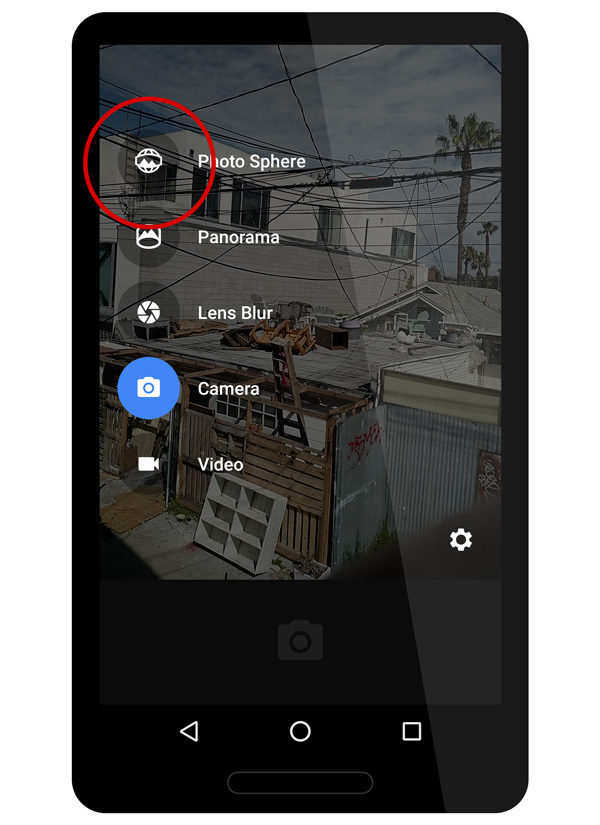
Those of you that are using an Android phone and have access to the default Google Camera App do not need to install the Street View App at all. The functionality to take 360° photos (or "Photo Spheres" as Google calls them) is right there in the camera app. Just select it from the side menu:

After you complete the operation, the phone needs to stitch all the photos into one nice 360° spherical picture. The output is a 8K pixel wide equirectangular JPG that is saved to your photo gallery. The image quality is very good and sharp but the stitching is rarely perfect. Overall, it's a pretty solid piece of technology!
Tips, tricks and examples
As I mentioned above, the biggest problem is that stitching is not that good. Because you need to rotate around holding the device in your hand, the position of the camera is not perfectly aligned most of the time. It's especially visible on photos that have a lot of straight lines such as walls, buildings, trees or... a straight horizon line.
The best places to take 360° photos are big outdoors, preferably nature settings such as forests, mountains - places with lots of irregular shapes around. Think about it on your next road trip! Below is one of my very first 360° photos. I did back in 2014 in Arches National Park in Utah.
Because the photo is made out of ~30 distinct photos that you need to take one after another, it's not very practical to take pictures of people or things that are on the move - you will get some ugly (but sometimes funny!) artifacts, such as people missing hands or half of their bodies. However, you can use this for your advantage, as in the photo below:
Sharing your photos
When I started to play with 360° photography there wasn't an easy way to share them online. So I set out to create a web app where I can upload and share spherical photos without much hassle. This is how Kuula was born.
It is a super simple app where you can upload 360° photos, add some filters and effects and share them with others. You can also browse what other people are posting and make some new friends in the community by following other users and liking their photos.
Feel free to take a look and, if you like 360° photography, register and share some of yours!
